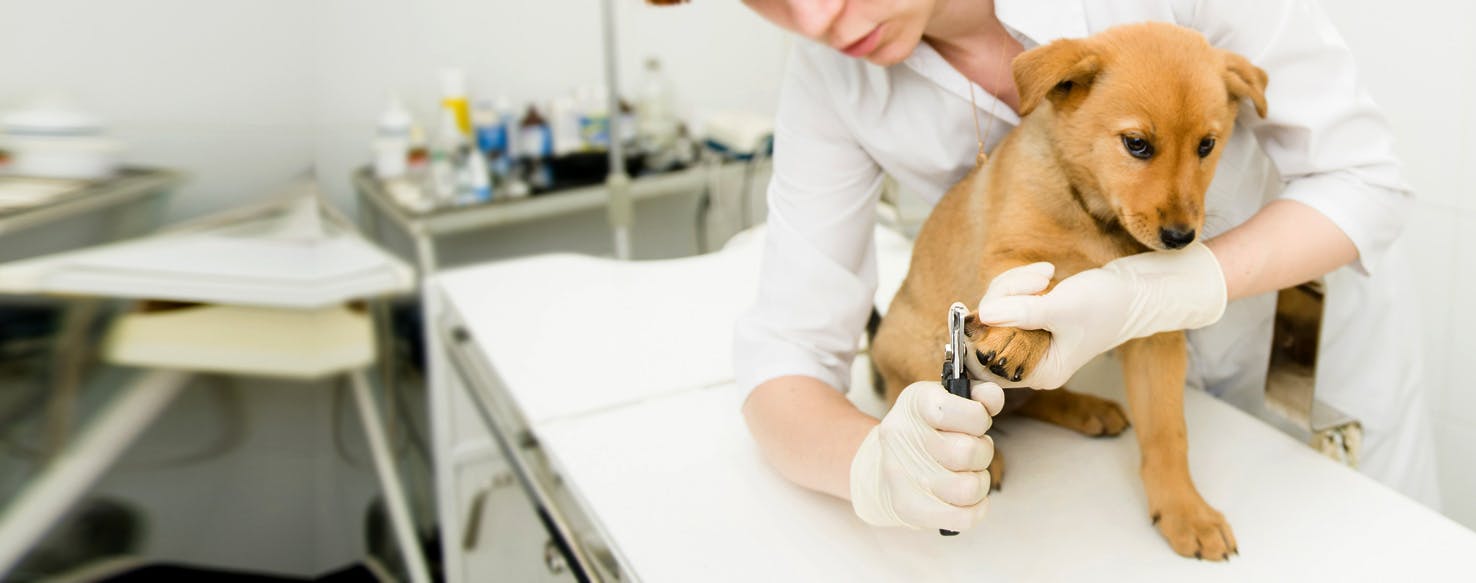
How To Cut Your Dogs Nails/Claws Safely
Stacey Wilson2021-05-05T15:23:17+01:00Why It's Important To Cut Your Dogs Nails?
Trimming and grooming your dogs nails is an essential part of being a dog owner. This is your complete guide on how to cut your dogs nails safely. Short and trim nails are a sign of your dog’s good health and hygiene. If you don’t feel like doing it yourself or are a little too squeamish, Professional dog groomers are always there to help.
It’s always a good idea when your dog is a puppy to handle their paws as much as possible. This way, when they grow up they’re used to you handling their paws and it will make this process 10x easier. Some dogs are happy to sit and let you cut their nails others may need to be restrained.
When To Start Clipping?
Like I mentioned earlier, it’s a good idea to start clipping your dogs nail as early as possible. Just like human nails, dogs nails continue to grow until they curl outward or even worse… inwards. Long nails are uncomfortable for dogs walk on. Long dog nails make your dog have less traction and are more likely to slip up. The main rule of thumb for dogs nails is if you can hear them clacking around on the ground/floor at home… it might be time for a claw trim.
Keeping Your Dog Comfortable
Everyone’s first mistake is rushing into cutting your dogs nails/claws on the first day. In order for you to cut your dogs claws safely you need to take your time. We would recommend about 1 week of training.
Day 1
Let your dog/puppy be around the nail clippers make sure your don’t force it near them. Place the dog nail clippers on the floor and let your dog sniff them. After that praise and reward your dog with a small treat.
Day 2
Take your dog nail clippers and gently touch them against the paws of your pup. Don’t squeeze them together at this point(the noise can make them wary). Again praise and reward your dog.
Day 3
Now your pup will slowly be getting used to the claw clippers. Take the clippers and touch them against each of your dogs paws. This time pretend to cut your dogs claws by squeezing the clippers together close to your dogs paws(not on the nails! Just close enough they can hear and see them clamping together). Again praise and reward your dog.
Day 4
Depending on how your dog is responding to this training. This is a good time to reflect on how its going. Is your dog okay being around the clippers now? Are they okay with you pretending to cut their nails? – If your dog is responding well, repeat Day 3 but this time touch the clippers agains your dogs nails. Not cutting them yet again, but just getting them that extra bit more comfortable with the tool.
Day 5
You’re ready. Take your dogs paw gently and cut off just the tip of one nail. Only one! and Just the tip of the claw. Give loads of praise and be sure to reward them if they did well.
Day 6
Now you have the training down. We’d still recommend doing only two claws at a time. Doing all of your dogs nails will make them panic and/or not let you do it. So just take it very easy and don’t over stretch it.
Day 7
At this point your can keep cutting your dogs nails paw at a time and over the next few days finish. It’s very important not to rush these things as they can save you a lot of time in the future.
Top Tip: Peanut Butter is your friend(Obviously unless you have nut allergy). Wrap your forehead in cellophane and apply a table spoon of peanut butter to your forehead. (Yes this does sound mental) BUT… This does actually work and is now my go to when cutting my pups nails. Just… make sure your close the curtains… or you’ll end up on Facebook with the caption ‘Loony Neighbour’.
Cutting Your Dogs Claws
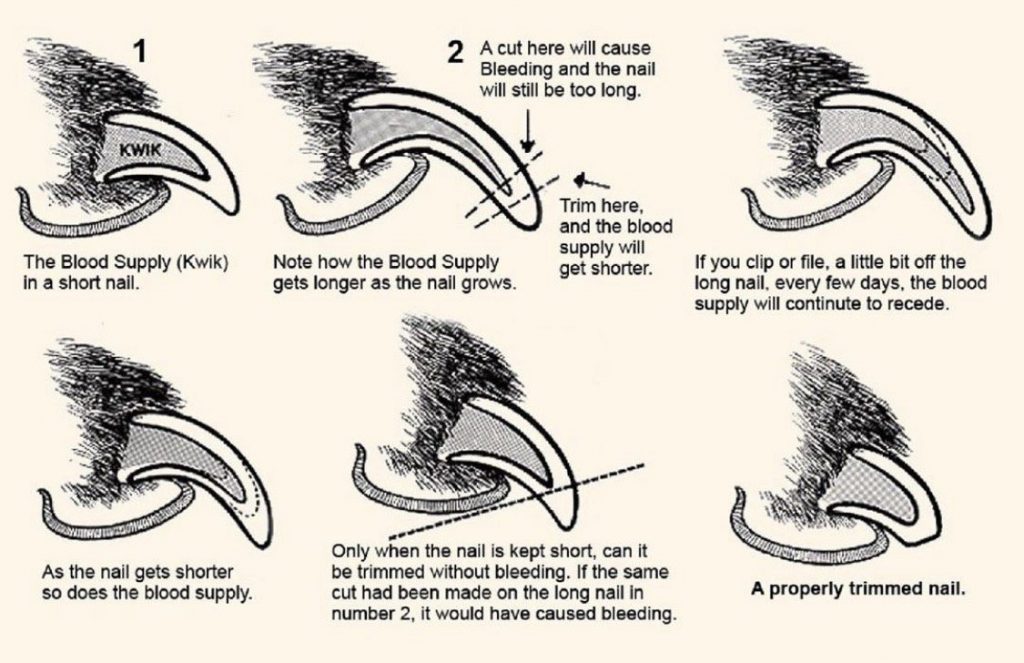
1. Pick up one paw, and firmly but gently place your thumb on the pad of a toe and your forefinger on top of the toe on the skin above the nail. Push your thumb slightly up and backward on the pad. While pushing your forefinger forward. This extends the nail. (Don’t squeeze the paw!)
2. Using your other hand, clip the tip only, straight across. Avoid clipping past the curve of the nail, or you risk hitting what is called the quick. A nick there is painful and will cause bleeding. It’s harder to see the quick on darker nails, clip on the hook-like part of the nail that turns down.
3. Examine the paw pads for foreign objects or injuries. In winter, clean your dogs feet after he has gone outdoor, this removes de-icing chemicals, salt, snow and Ice, which can injure the feet or make your dog sick if he licks his paws.
Still Having Trouble Cutting or Trimming Your Dogs Claws?
Congratulations! You’ve finished our blog on how to stop dogs behaving badly! Want More?! Check out some of our other fantastic blogs… Click Here to view more. Don’t forget to check out our Instagram, Facebook & Twitter.



Comment (1)
was worried about trying anything, after reading this i feel alot more comfortable thanks a bunch
Comments are closed.